This overview will take you through every key aspect of Apple Pay, including the timeline of its development, the latest statistical data related to it, its benefits for merchants and consumers, and the method of its integration into business operations.
What Exactly Is Apple Pay?
Apple Pay is a mobile payment and digital wallet service developed by Apple Inc. It allows users to complete purchases in person, in iOS apps, and on the web and is supported on the following devices:
- iPhone
- Apple Watch
- iPad
- Mac
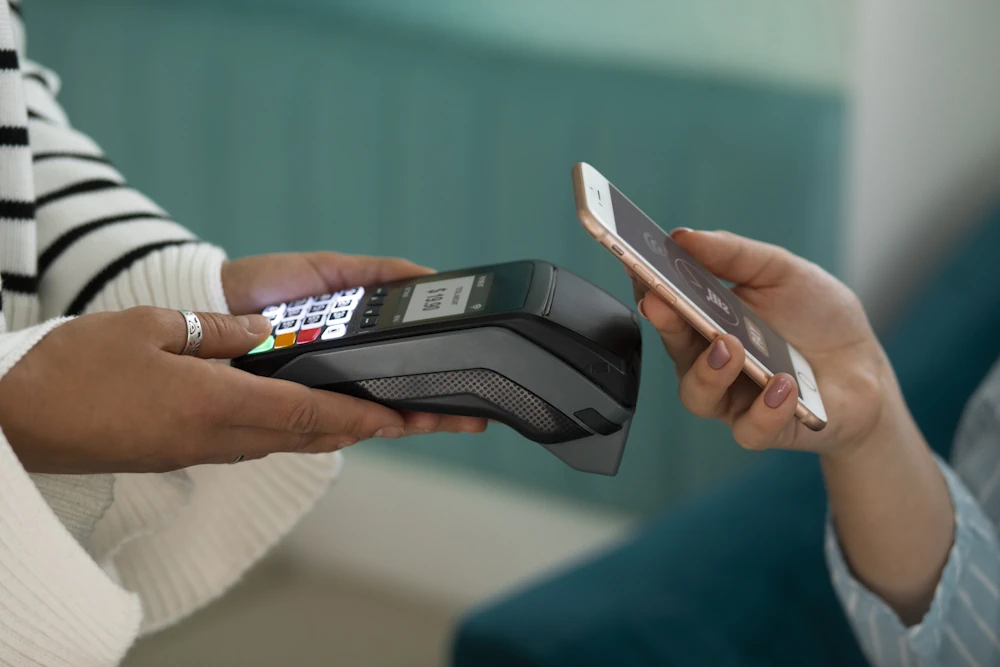
This payment method replaces payment cards at contactless-capable POS terminals by using near-field communication (NFC).
Apple Pay can also be used for some public transport networks through the use of credit and debit cards, like for TfL in London and SL in Stockholm, or for dedicated travel cards, such as for the San Francisco Bay Area's Clipper and Hong Kong’s Octopus Card.
Brief History of Apple Pay
Apple Pay launched relatively recently, yet its history is very eventful. Let’s take a look at its development timeline1:
- September 2014 - The launch of Apple Pay was announced at Apple’s iPhone 6 and Apple Watch keynote.
- October 2014 - Apple Pay begins its operations in the US.
- April 2015 - Apple Watch begins to support Apple Pay in the US.
- June 2015 - At WWDC, Apple announced the launch of Apple Pay in the UK with the potential to support store cards (e.g., JCPenney Credit Card) and reward cards (e.g., Dunkin’ Donuts DD Perks).
- July 2015 - Apple Pay launches in the UK, supporting eight banks (yet only one of the “big four” banks).
- April 2016 - ANZ makes Apple Pay available to its Visa and American Express cardholders in Australia.
- May 2016 - Apple Pay begins its operations in Canada.
- May 2017 - The service continues its global expansion, launching in Ireland, Italy, Finland, Denmark, Sweden, UAE, and beyond.
- May 2018 - Apple Pay is prominent in more than 35 countries.
- July 2018 - The payment service reaches approximately 250 million active users.
- March 2019 - Apple announces that Apple Pay has been used to conduct over 10 billion transactions.
In November
2019, the world felt the first hit of the global pandemic. While many organizations and services had to shut down, Apple Pay approached this unfortunate situation as a business opportunity and has achieved great success - find out more about it below!
Current Apple Pay State in Numbers
To illustrate the scale of Apple Pay’s prominence nowadays, we’ve collected some of the latest statistical data2:
- As of 2022, Apple Pay has over 500 million registered users worldwide.
- The number of Apple Pay users in the US is expected to hit 45.4 million by the end of
2022, marking an 8.7% increase compared to 2021 and accounting for
16.2% of the country’s population. In 2023, this number is forecasted to increase by
7.3%, up to 48.7 million people.
- Globally, Apple Pay gained 66 million new users in 2020.
- In 2021, 6 out of 10 people in the UK used Apple Pay for POS transactions.
As you can see, Apple Pay has not only managed to survive the pandemic but has also experienced rapid growth. It is mainly due to the fact that this payment service helped facilitate contactless transactions when the social distancing measures.
Which Age Groups Mainly Use Apple Pay?
As a business owner or merchant, you are most likely willing to know which age groups you would target when integrating Apple Pay. One of the easiest ways of finding it out is to take a look at the US, Apple’s biggest market.
The latest available data shows the following picture3:
- Retirees - In the oldest age group, 78% of respondents were aware of the Apple Pay service, yet only
2% have used it.
- Boomers - Among people born between 1946 – 1964, 83% have heard about Apple Pay, but only
3% tried to use it at least once.
- Gen X - US citizens born between 1965 – 1980, the vast majority knew about Apple’s mobile wallet (91%), and
19% have used it.
- Millennials- When it comes to Gen Y, the awareness level was exactly the same as for Gen X, yet the usage of the service was notably higher, equaling
25%.
While there is no comparison of Apple Pay awareness Vs. usage rates among Gen Zers to date, it is safe to say that the share of representatives of this generation dealing with Apple Pay is significantly bigger than that of other age groups.
In fact, a recent study in the US demonstrated that
73.1% of Gen Z shoppers with Apple Pay installed used it for in-store purchases. This figure is notably higher compared to the
52% reported for both millennials and Gen X users.
Thus, it’s clear to see that if your target audience consists of younger people, integrating Apple Pay is a must to keep up with the competition.
The Main Advantages of Apple Pay
Apple Pay’s contactless payment feature has definitely played out to be extremely beneficial for the users and proves to be useful even in post-COVID times. However, this payment service has plenty of other advantages for both businesses and consumers.
Apple Pay
Pros for Businesses
Merchants that opt for Apple Pay services experience plenty of advantages, such as:
- Wide scale of reach. With an Apple Pay integration, you enable millions of active users to pay for your products and services conveniently.
- No additional fees. There are no extra costs involved in processing Apple Pay purchases. All that you’ll have to cover is the regular credit card transaction fees4.
- Simple integration. It is fairly fast and easy to start accepting Apple Pay in a physical store, via the website, or through an app. We’ll go into more detail about it later in this guide.
- Higher purchase frequency. The ease of use and popularity of Apple Pay help reduce cart abandonment rates and effectively boost conversions.
Apple Pay
Benefits for Consumers
- Outstanding convenience. Apple Pay users don’t have to carry bank cards with them, as all the payment information is stored in the digital wallet. Besides, if the consumer has an Apple Watch, they don’t even need to take out their phone to make a purchase!
- Offline usability. With Apple Pay, users can conduct purchases even when they are offline, including while their smartphone is in airplane mode.
- High transaction speed. When it comes to in-store transactions, it only takes one tap for a consumer to make a purchase. Likewise, making payments online with Apple Pay happens in a matter of clicks.
In addition, Apple Pay stands out among other payment services with its
advanced security. Let’s take a look at this aspect in more detail.
Why is Apple Pay More Secure Than Other Services?
Global eCommerce losses to online payment fraud increased by
14% year over year, reaching $20 billion in 20216. Thus, it’s no surprise that payment security is a major concern for both merchants and their customers.
Clearly, the consumers that use Apple Pay already have a leg up due to the fact that they don’t have the need to carry physical cards that can be easily lost or stolen. And, while no payment system is completely safe from fraud, Apple Pay’s additional security layers reduce its risk significantly.
Apple Pay has security features built into the hardware and software of Apple devices to protect payment transactions. Besides, to use Apple Pay, the users must have a passcode set on their devices and, optionally, have Face ID or Touch ID enabled.
Apple’s biometric authentication systems make the payment process even more simple and secure. Here’s how they work:
- Face ID - This facial recognition system is used by Apple for a variety of tasks, including unlocking a device, accessing sensitive data, and making payments. Its hardware consists of a combination of light projectors and sensors that take several images of a user’s facial features to build a detailed map of their face. This map is then compared with the registered face via a secure subsystem. Face ID works accurately even when a user wears glasses or makeup, can still recognize the face with different facial hair, and adapts to time-related appearance changes.
- Touch ID - The sensor takes a high-resolution image of small sections of a user’s fingertip from the subepidermal layers of their skin, analyzes it, and categorizes the fingerprint as an arch, loop, or whorl type. Touch ID can read multiple fingerprints in 360-degrees orientation. When a user touches the sensor, it creates a mathematical representation of the fingerprint and compares it to the registered data to identify a match.
In addition, Apple Pay is designed to protect users’ privacy. The payment service doesn’t store or have access to the original credit, debit, or prepaid card numbers registered in the digital wallet and doesn't retain any transaction information that can be linked back to the user. Thus, the payment data stays between the consumer, the merchant or developer, and the bank or card issuer.
What Are the Drawbacks of Using Apple Pay?
Undoubtedly, Apple Pay has plenty of benefits. Yet, no payment system is perfect, and it’s important to know the potential downsides before implementing one.
Cons of Apple
Pay for Merchants
There are two main factors merchants should be concerned about when it comes to purchases made with Apple Pay.
- Potential confusion among first-time users. While many customers have Apple Pay on their devices, not all of them know how to use it. Thus, the transaction may end up not being as seamless as hoped for if the consumer is trying to use this payment system for the first time. When it comes to online shopping, you might be receiving requests via chat, email, or phone for help getting this payment method to work.
- Card clash. This term stands for the interference that occurs when the consumer brings more than one card or contactless payment device close to a card reader when making an in-store purchase. For instance, if your client keeps their physical cards in their iPhone case and tries to use Apple Pay, they may experience a card clash.
Both these issues can affect the consumers’ shopping experience negatively and result in a purchase not being finalized. However, they can be resolved easily with the help of properly trained personnel who understand how Apple Pay works and can provide the customers with clear guidance.
Apple Pay
Disadvantages for Consumers
Consumers can also experience some difficulties when using Apple Pay even though this payment service has multiple security protocols in place.
Jailbroken iPhones, devices that are modified to get around the limitations set by Apple to get unrestricted access to files and apps, are fairly common. Such smartphones may negate some of the security layers, resulting in a higher risk of hacking.
Now that you’re aware of the advantages and possible downsides of Apple Pay, let’s take a closer look at how this payment solution works.
How Does Apple Pay Work for Merchants?
It is clear to see that the advantages of Apple Pay outweigh the potential drawbacks associated with it, so its popularity is set to continue rising. Thus, if you still haven’t introduced this payment method into your business operations, it’s advisable to start working on it without delay.
From a consumer perspective, Apple Pay works in the most straightforward way possible, which is a significant reason for its appeal. Yet, the underlying mechanics and technology for this payment solution are more complicated.
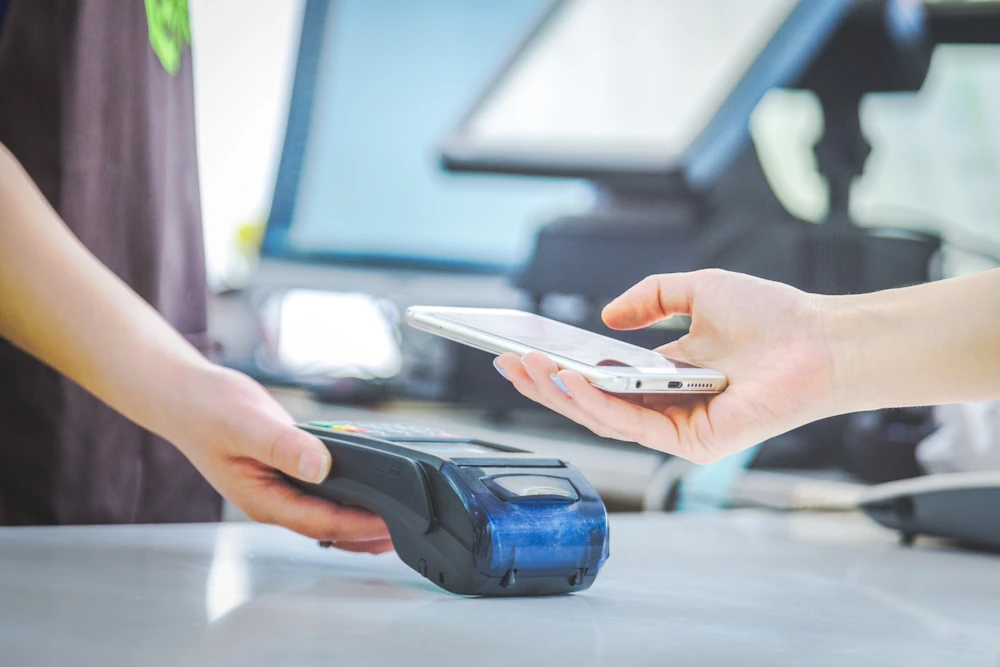
In-Store
Purchases
Apple Pay uses near-field communication technology to interact with contactless payment terminals. NFC can be regarded as a cousin to Wi-Fi, as they have similar technologies. However, NFC is specifically designed to work when two data-exchanging devices are close to each other, while Wi-Fi works perfectly fine at greater distances.
Thanks to NFC, payments at brick-and-mortar stores for
iPhone users are completed in three simple steps:
- When it’s time to pay, the consumer opens a Wallet app on their iPhone, places their smartphone near the card reader, and taps the card they wish to use.
- As soon as the reader confirms a connection between it and the phone, the customer will have to authorize the transaction by using Face ID, a password, or Touch ID.
- Once the transaction is confirmed, the client will see the message reading “Done” and a checkmark on the display.
The process is very similar when conducted through
Apple Watch:
- To use the default card, the consumer has to double-click the watch’s side button while holding the display close to the contactless reader.
- The shopper has to wait until they feel a gentle tap to confirm the transaction.
If a client wishes to use a different card on Apple Watch, they have to swipe left or right to select it after double-clicking the side button.
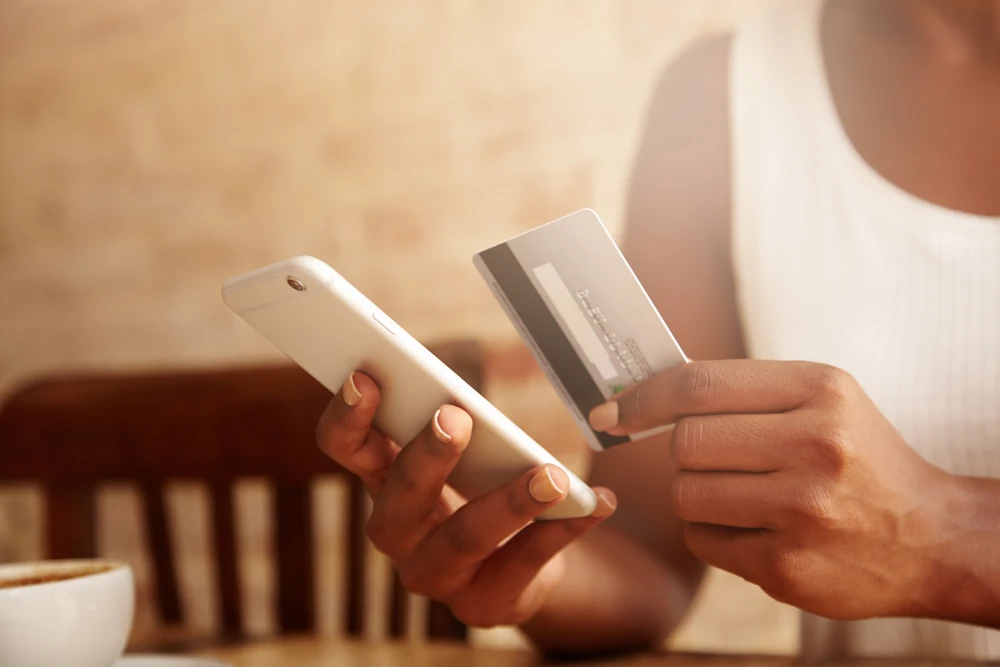
Online
Transactions
It is also possible for shoppers to use Apple Pay for in-app and web payments.
Here is the procedure to make a purchase
in an application:
- Depending on the setup, the user taps the Apple Pay button inside the app or selects Apple Pay as their preferred payment option.
- Then, the consumer fills in their shipping, billing, and contact information and selects the card they wish to use.
- The purchase confirmation will depend on the type of device used:
- iPhone X or later/iPad with Face ID: The user has to double-click the side button, then use Face ID or enter a passcode.
- iPhone 8 or earlier/iPad without Face ID: The customer only needs to authorize the transaction with Touch ID or a passcode.
- Apple Watch: The shopper has to double-click the device’s side button.
If the payment is successful, the word “Done” and a checkmark will appear on the screen.
When an Apple Pay user is trying to complete a transaction through a
Safari web browser, the process is very similar:
- If a shopper is using a non-Touch ID device on a supported website, the payment process follows the exact same procedure as for online transactions.
- On a Touch ID Mac, the only difference will be the fact that the consumer has to follow the prompts on the Touch Bar and place their finger on the Touch ID to confirm the payment.
It is crucial for merchants to understand how the clients’ side of the Apple Pay transactions looks to be able to assist them in case any issues arise. Now that this part is clear, it’s time to get to know how to set up Apple Pay for your business.
Setting Up Apple Pay: the Service’s Availability Worldwide
Before you get to the step-by-step instructions on integrating Apple Pay into your business, it’s important to confirm whether this payment solution is available in the country where your company operates.
Here is the list of regions and countries that support Apple Pay as of October 2022:
Africa
Currently, the only country on the African continent that supports Apple Pay transactions is
South Africa.
Asia-Pacific
The countries that support Apple Pay in the Asia-Pacific region are:
- Australia
- China mainland
- Hong Kong
- Japan
- Macao
- Malaysia
- New Zealand
- Singapore
- Taiwan
Europe
The majority of European countries support Apple Pay, namely:
- Armenia
- Austria
- Azerbaijan
- Belarus
- Belgium
- Bulgaria
- Croatia
- Cyprus
- Czech Republic
- Denmark
- Estonia
- Faroe Islands
- Finland
- France
- Georgia
- Germany
- Greece
- Greenland
- Guernsey
- Hungary
- Iceland
- Ireland
- Isle of Man
- Italy
- Kazakhstan
- Jersey
- Latvia
- Liechtenstein
- Lithuania
- Luxembourg
- Malta
- Moldova
- Monaco
- Montenegro
- Netherlands
- Norway
- Poland
- Portugal
- Romania
- San Marino
- Serbia
- Slovakia
- Slovenia
- Spain
- Sweden
- Switzerland
- Ukraine
- United Kingdom
- Vatican City
Latin America
and the Caribbean
For now, out of the 33 countries in Latin America and the Caribbean, only a handful will accept Apple Pay, including:
- Argentina
- Colombia
- Costa Rica
- Brazil
- Mexico
- Peru
Middle
East
In the Middle East, Apple Pay is currently accepted across 6 countries:
- Bahrain
- Israel
- Palestine
- Qatar
- Saudi Arabia
- United Arab Emirates
North
America
Two out of the three countries on the North American continent accept Apple Pay, namely:
If your company is established in any of the aforementioned countries, you can proceed to the next step - setting up Apple Pay for your business.
How Do I Set Up Apple Pay as a Retailer?
Here’s what you have to do to introduce Apple Pay into your business operations:
1. Select a
Payment Processor
The first step to being able to use Apple Pay as a merchant is to implement a payment processing platform, such as Payneteasy, on your website. Contact us already today and we will find a tailored solution that will match your business goals best!
Alternatively, if you currently use an eCommerce platform that supports Apple Pay, you can utilize an Apple Pay SDK or JavaScript API.
2. Set Up
Apple Pay In-Store or Online
To enable your customers to make in-store purchases with Apple Pay by simply bringing their devices near the reader, you will need to ensure you have the right hardware. Thus, if your point-of-sale terminal isn’t NFC-enabled, you will have to get one that is.
Once you get an NFC-enabled POS terminal connected to a processing platform or acquirer bank, you’re all set. If you are searching for the most efficient payment processing platform, reach out to Payneteasy, and our team will provide you with the perfect solution!
When it comes to online purchases, there are three options through which you are likely to be accepting payments:
- Through your website
- In an app
- At an e-commerce platform
Each of these use cases requires a different approach. However, you should always refer to the documentation provided by the payment processor or eCommerce platform you’re using. Apple’s proprietary documentation is also a useful reference, yet every payment processor might have additional implementation specifics.
Payneteasy
guarantees a swift and secure integration of Apple Pay for you to start processing payments
through the channels you need in no time!
3. Test the
Setup
Whatever path you go down, it’s of utmost importance to test your setup thoroughly. This is applicable to both in-store and online use cases. After all, you don’t want to have any unwanted surprises when customers try to use Apple Pay at your store.
Here’s what you can do:
- For an in-store setup, try using various iPhone iOS versions, check how the system works with an Apple Watch, and test it by hovering the devices from different distances.
- For an online setup, it’s helpful to test it with as many different devices as possible (iPhone, Apple Watch, iPad, and Safari browser). You can also try to see how the payments work when using mobile data and Wi-Fi.
It is critical to be diligent with the testing process, as there are many possible scenarios that could potentially hinder the transactions.
4. Conduct
Employee Training
Your in-store staff will need to understand how Apple Pay works and be able to troubleshoot in case issues arise. This means you should explain to your employees everything they need to know regarding accepting Apple Pay purchases through the fixed front-of-store POS system, mobile POS tablets, or iPhones in case of Tap to Pay.
Even when launching Apple Pay for online purchases, it’s crucial to keep your personnel up-to-date to avoid confusion and ensure that they have no unanswered questions regarding this payment service.
5. Inform
Your Clients
Finally, it’s extremely important to inform your customers about the new payment method at your store. Apple Pay is a renowned and trusted brand that can help you boost conversions, especially when it comes to online sales, but your clients won’t know you work with it unless you make it visible.
Here are some of the most effective ways to let your clients know you accept Apple Pay:
- Brick-and-mortar store window signage. If you have a physical store, it is highly likely that you already have a “We Accept” decal on your window display that lists the payment methods you accept. This could include some popular card options like Mastercard and Visa or other digital wallets, such as Samsung Pay and Google Pay. Adding an Apple Pay sticker is a simple yet effective way to let consumers know you now accept it.
- In-store signs. Aside from the window decal, you can also set up some Apple Pay logos inside the store. Even a small sign at the register will make a big difference and give your customers a last-minute reminder that they can use a mobile wallet instead of a credit card.
- Checkout reminders. When conducting staff training, you can encourage your employees to remind clients that you now accept Apple Pay.
- Note on the receipt. It sometimes happens that the customer misses the Apple Pay signs in the store or doesn’t have the wallet set up at the time of purchase. That’s why it often helps to add a reminder saying that you now process Apple Pay transactions on the receipt for the first few months after setting up this payment option.
- Online checkout badge. One of the most effective tactics when it comes to informing your online customers about the new payment option is adding the Apple Pay logo or button to the checkout screen. This method is really helpful in decreasing cart abandonment rates, as consumers see that they can complete the checkout fast and securely.
- Website footer. You can also place the Apple Pay logo in your website footer. This way, it will appear on every page of your site, increasing the chances that potential customers will see it.
- Email. An email newsletter is a powerful way of marketing communication that can be used to inform your clients that they can now make purchases using Apple Pay at your store.
- Phone call inquiries. Depending on your line of business, you might be receiving phone calls from potential clients regarding products and delivery times quite often. If you see that a consumer that’s calling you is security-conscious, it could be a great idea to mention that you accept Apple Pay when responding to their inquiry, as it’s a highly trusted payment option.
Implement a combination of these methods to reach out to the right mix of target groups and achieve the best results!
How Do I Integrate With Apple Pay for In-App Purchases?
We’ve already explained how the process of introducing Apple Pay to your business operations goes, but you might be wondering what you have to do to set it up on the technical side.
Let’s talk about
integrating Apple Pay into an app. To set up the environment for it, you must complete these steps:
1. Create a
Merchant ID
Follow these steps to set up an Apple merchant ID:
-
Go to https://developer.apple.com and sign in to your developer account. Then, click on “Certificates, Identifiers & Profiles”.
- Proceed to the “Identifier” section and select “App ID”. Make sure you click the “Explicit App ID” button since wildcard App IDs won’t enable you to make purchases with Apple Pay. Also, remember to select the Apple Pay checkbox under “App Services”.
- Once it’s done, click “Continue” and submit the form - your new App ID is now created.
-
Now, navigate to the “Merchant ID” section and click the “+” icon.
-
You will be redirected to the following screen:
-
Enter the desired description and create a Bundle ID for your app that starts with the word “merchant.” For instance, “merchant.com.company.app”
2. Submit a
Certificate Signing Request (CSR)
Another essential step is to make a certificate signing request:
-
Under the “Keychain Access” tab, select “Certificate Assistance” and proceed to click “Request a Certificate from a Certificate Authority”.
- After that, input your email in the “User Email Address” field and choose the “Saved to Disk” option. As for the “CA Email Address” field, you can leave it empty.
3. Create a
Payment Processing Certificate
The next step is to create a payment processing certificate that will protect transaction data. Here’s how to do it:
- Return to the member center and choose “All Certificates” from the side menu.
-
To create a new certificate, select the “+” button in the top right corner.
- Click “Apple Pay Payment Processing Certificate” under the “Production” tab.
- Select the merchant ID you created in the previous step and tap on “Create Certificate” under “Apple Pay Payment Processing Certificate”.
- Press “Continue” and upload your CSR saved from Keychain Access.
Job done - you’ve created your payment processing certificate. Now you have to download it and save it with your project. Once you double-click the certificate, it will be processed in Keychain Access.
4. Determine
Apple Pay Capabilities in Xcode for Your Project
Now it’s time to return to Xcode and do the following:
- Go to your project in Xcode and click “Capabilities”.
- Switch on the Apple Pay toggle and choose the merchant ID you created. If you don’t see the correct one, tap “+” and enter your merchant ID’s name.
Your screen should look like this:
Note that it is important that all three boxes in “Steps” are checked.
5. Create a
Sandbox User in iTunes Connect
For this step, you will first need to create a new Gmail account. After that, proceed to do the following:
-
Go to https://itunesconnect.apple.com/ and select “Users and Roles” on the main page.
-
On the screen that appears, select “Sandbox Testers” and click the “+” icon.
- Fill in the form that opens. Remember that it’s critical to choose a country that supports Apple Pay. You can refer to the list in this guide to ensure you’re making the right selection.
- Confirm your new Apple ID through Gmail.
Now you’re all set to move on to the next step.
6. Add a Test
Card
The first thing you’ll have to do here is change the iPhone’s region to the one you selected during step 3. Here’s what you should do next:
- Log out from your current iCloud account on your iPhone and sign in with the newly created Sandbox user.
-
Add a test card to Apple Pay on iPhone. Here’s an example:
- FPAN (Funding Primary Account Number): 5204 3871 0000 2003
- Expiration Date: 10/2026
- CVC: 123
Once this step is complete, you’re ready to create a test payment request.
7. Place a
Payment Request for Your Project
To create a payment in your app, do the following:
-
Add any button to the ViewController in the storyboard, for example:
- Connect IBAction to your ViewController.swift.
- To enable Apple Pay, insert Import PassKit at the top of the ViewController.swift file.
-
Now you can start configuring the payment request in purhcaseItem():
- Run your app to test the changes after you click the “Buy with Apple pay” button.
- Add applePayController?.delegate = self to purhcaseItem().
-
After that, you’ll need to create an extension:
8. Handle the
Result
To imitate a successful purchase and verify that the Apple Pay integration in an iOS app is complete, you have to fulfill the payment request with a payment system of choice.
The line of code that reads
completion(PKPaymentAuthorizationResult(status: PKPaymentAuthorizationStatus.success, errors:
[])) is responsible for that.
If the setup was completed successfully, you will see the following result in your app:
Remember to conduct additional tests before letting the system go live to ensure it is error-free.
What Is Apple Pay Setup Like for Consumers?
As you can see, the Apple Pay setup is pretty straightforward for merchants. Thus, it is no surprise that the tech giant ensured that this process is even simpler for consumers.
To get started with Apple Pay, the user needs to ensure they have these three elements in place:
- A compatible device with an up-to-date version of iOS, macOS, iPadOS, or watchOS.
- A credit or debit card from a participating card issuer.
- An Apple ID signed in to their Apple device.
If all of these are present, all that the consumer has to do to access Apple Pay services is to add their debit or credit cards to the mobile wallet.
For
iPhone, the procedure is as follows:
- The user taps the “Add” button in the Wallet app and selects “Debit or Credit Card” to add a new card. It is also possible to select “Previous Cards” to restore a card used previously.
- Then, the consumer adds a payment card to the Wallet app, taps “Continue”, and follows the prompts that appear on the screen.
- The final step is to verify the action with the card issuer or banks. They might request the user to provide additional information or to download an app before approving the card for use with Apple Pay.
If the iPhone is paired with an
Apple Watch, it is also possible to add a payment card there. To do it, the user will have to:
- Open the Apple Watch app and tap “Wallet & Apple Pay” in the “My Watch” tab.
- Select “Add Card” and tap “Debit or Credit Card”.
- Select “Previous Card” to add the card you added to your smartphone, and tap “Continue”.
The procedure is very similar when it comes to adding the card to
Mac or iPad.
Once the desired payment card is added to the device, the user can start making purchases with Apple Pay immediately.
A Peek at Services Related to Apple Pay
When the Apple Pay setup is complete, you may also want to optimize the payment process even more with some additional services from Apple.
Apple
Cash
Apple Cash is a digital card in the Wallet app that enables users to send and receive funds in Messages or Wallet. Consumers can spend this money online, in brick-and-mortar stores, and in apps with Apple Pay.
Apple Tap to
Pay
One of the latest additions to Apple's financial suite of services is Apple Tap to Pay, introduced in
February 2022. This feature transforms supported iPhones (with iOS 15.4 or higher) into mobile POS terminals - no extra hardware required.
With Tap to Pay, merchants can seamlessly and securely accept contactless bank cards, Apple Pay, and other digital wallets with the help of NFC technology.
Apple Pay
Later
In June
2022, the tech giant announced the launch of Apple Pay Later. It is a Buy Now, Pay Later (BNPL) type of service that enables Apple Pay users to split payments into four equal installments over six weeks.
The official release of this feature is linked to iOS 16, yet some users were able to access it earlier due to the availability of a developer beta version.
How to Use Gift Cards and Loyalty Cards With Apple Pay
Merchants have to make sure that their loyalty cards and gift cards are Apple Pay-compatible before they can begin to offer them to their clients. Note that even though Apple Pay has increased the number of prepaid card providers it supports, it will still take some time before the majority of providers join the system.
To get started, visit Apple’s official website and check the list of banking partners that support Apple Pay in your region. Generally speaking, Apple Pay is compatible with Visa and Mastercard gift cards and loyalty cards, while the instances when it is true for American Express prepaid cards are a lot rarer.
If you are still not sure which prepaid card would work best with Apple Pay for your business, you can reach out to Apple’s online support representative for further assistance. Another option is to try adding your loyalty card or gift card directly to Apple Pay and see whether it’s compatible with the system.
Apple Pay’s Future: Will It Thrive in the Upcoming Years?
Many business owners and merchants don’t want to make a hasty decision and introduce a payment option, the future of which is vague. Luckily, in the case of Apple Pay, this shouldn’t be a concern.
Industry experts’ conclusions based on the smartphone adoption rates and overall retail spending trends, the number of Apple Pay users is expected to increase by
9 million between
2022 and 2026 in the US alone
5.
Besides, as more and more communities across the globe begin to work toward the idea of a cashless society, mobile wallets and Apple Pay, in particular, are guaranteed to keep gaining prominence.
Ready to Begin Your Journey With Apple Pay for Business?
In this overview, we’ve covered all the essential information for you to set up Apple Pay for your business, make the most out of this integration, and help consumers troubleshoot any potential issues related to this payment option.
Payneteasy makes implementing Apple Pay even faster! Our convenient and secure payment platform enables you to easily manage Apple Pay transactions alongside other payment methods from a single dashboard. Don’t hesitate to reach out to us for more information!
1 - Everest Group - Apple-Goldman Sachs Partnership Could Steal Credit Card Market Share from Consumer Banks
2 - Fortunly - 10+ Apple Pay Statistics That Show Mobile Payments Are the Future
3 - Statista - Level of familiarity with Apple Pay according to online users in the United States
4 - Apple Developer - Apple Pay
5 - Statista - Global e-commerce payment fraud losses 2021
6 - Statista - Estimates on the number of users of selected contactless/tap to pay platforms in the United States
Contact author